Hvordan sette opp en offentlig kursbutikk og promotere kurs til eksisterende studenter
Denne guiden viser deg hvordan du kan vise frem kursene dine for publikum (via en skoleside) og for eksisterende studenter (via studentpanelet).
Vi vil dekke:
- Opprettelse av en offentlig kursbutikk
- Promotering av kurs på studentdashbordet
Forutsetninger:
- En systeme.io konto
- Kurs opprettet på kontoen din
- En student som har tilgang til minst ett av kursene dine
- En salgstrakt med en salgsside
Del 1: Hvordan opprette din offentlige kursbutikk
For å vise en katalog over kursene dine for publikum, kan du bruke skolesiden din.
Slik fungerer skolesiden:
Denne siden fungerer som et sentralt bibliotek som ligger på yourdomain.com/school. Den er tilgjengelig for alle, også besøkende uten konto.
Slik legger du til kurs i butikken din:
1. Få tilgang til kursinnstillinger
Gå til kurs-fanen. Velg kurset du vil fremheve og klikk på Innstillinger (1).

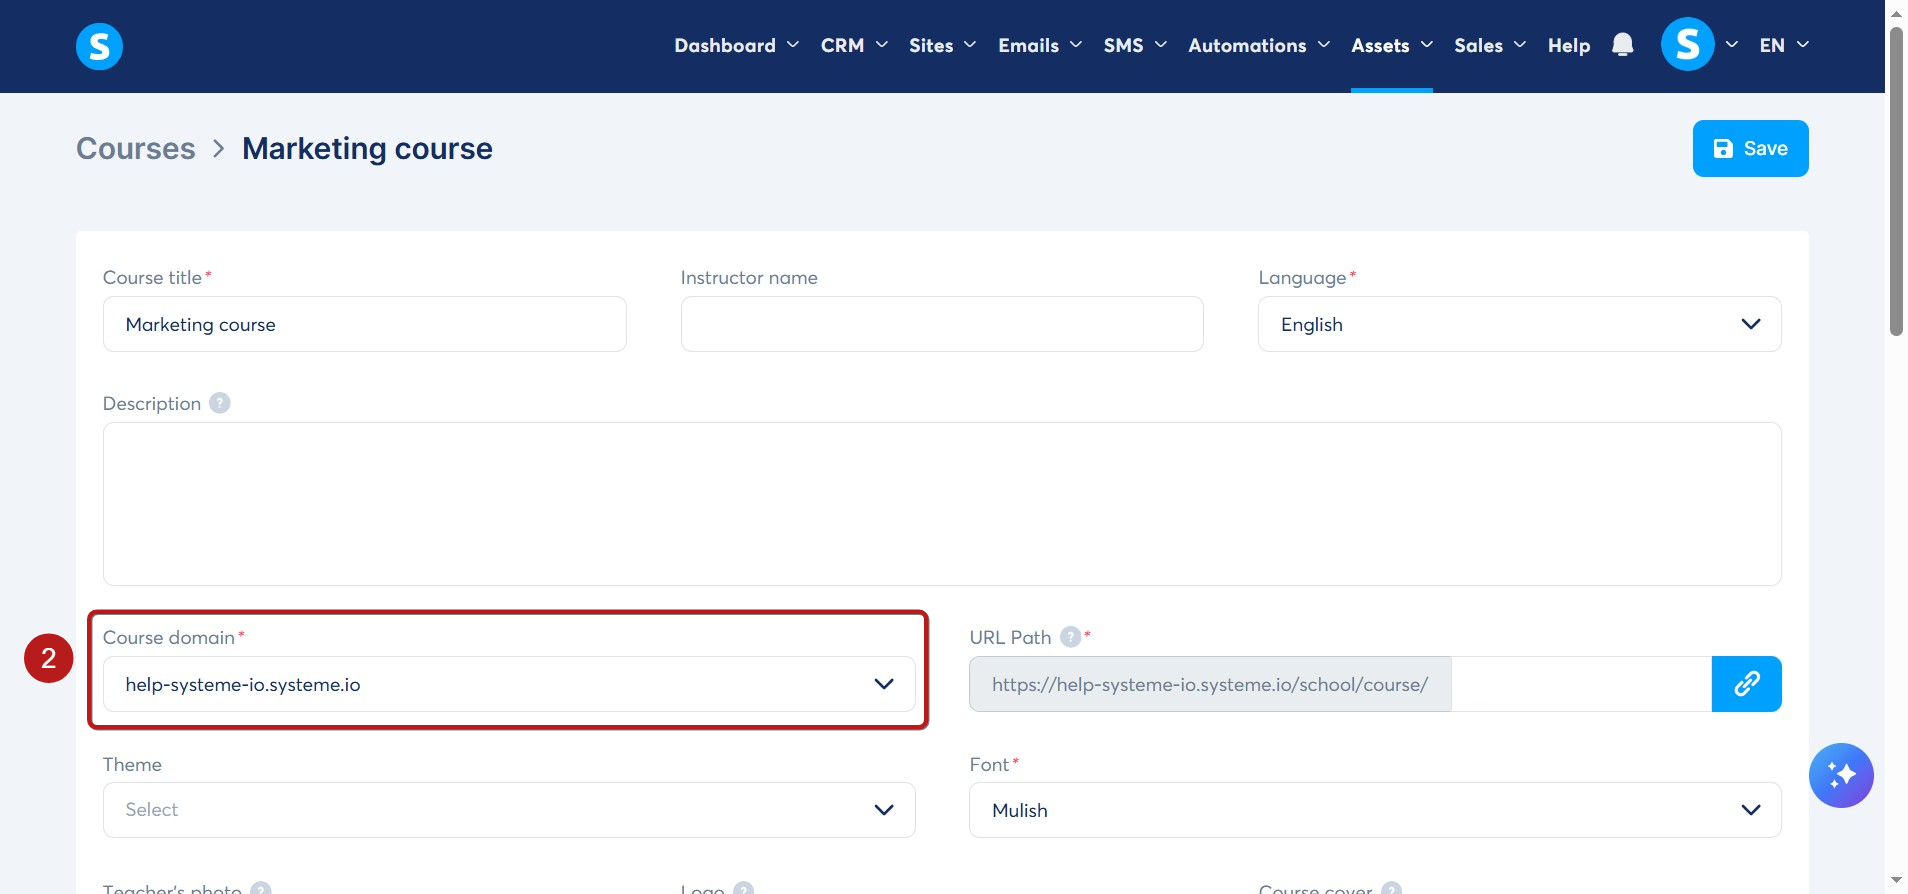
2. Assign a domain
Select the domain you want to use for this course (2).
-
Connect a sales page
To list the course, the system needs to know where to send potential buyers.
-
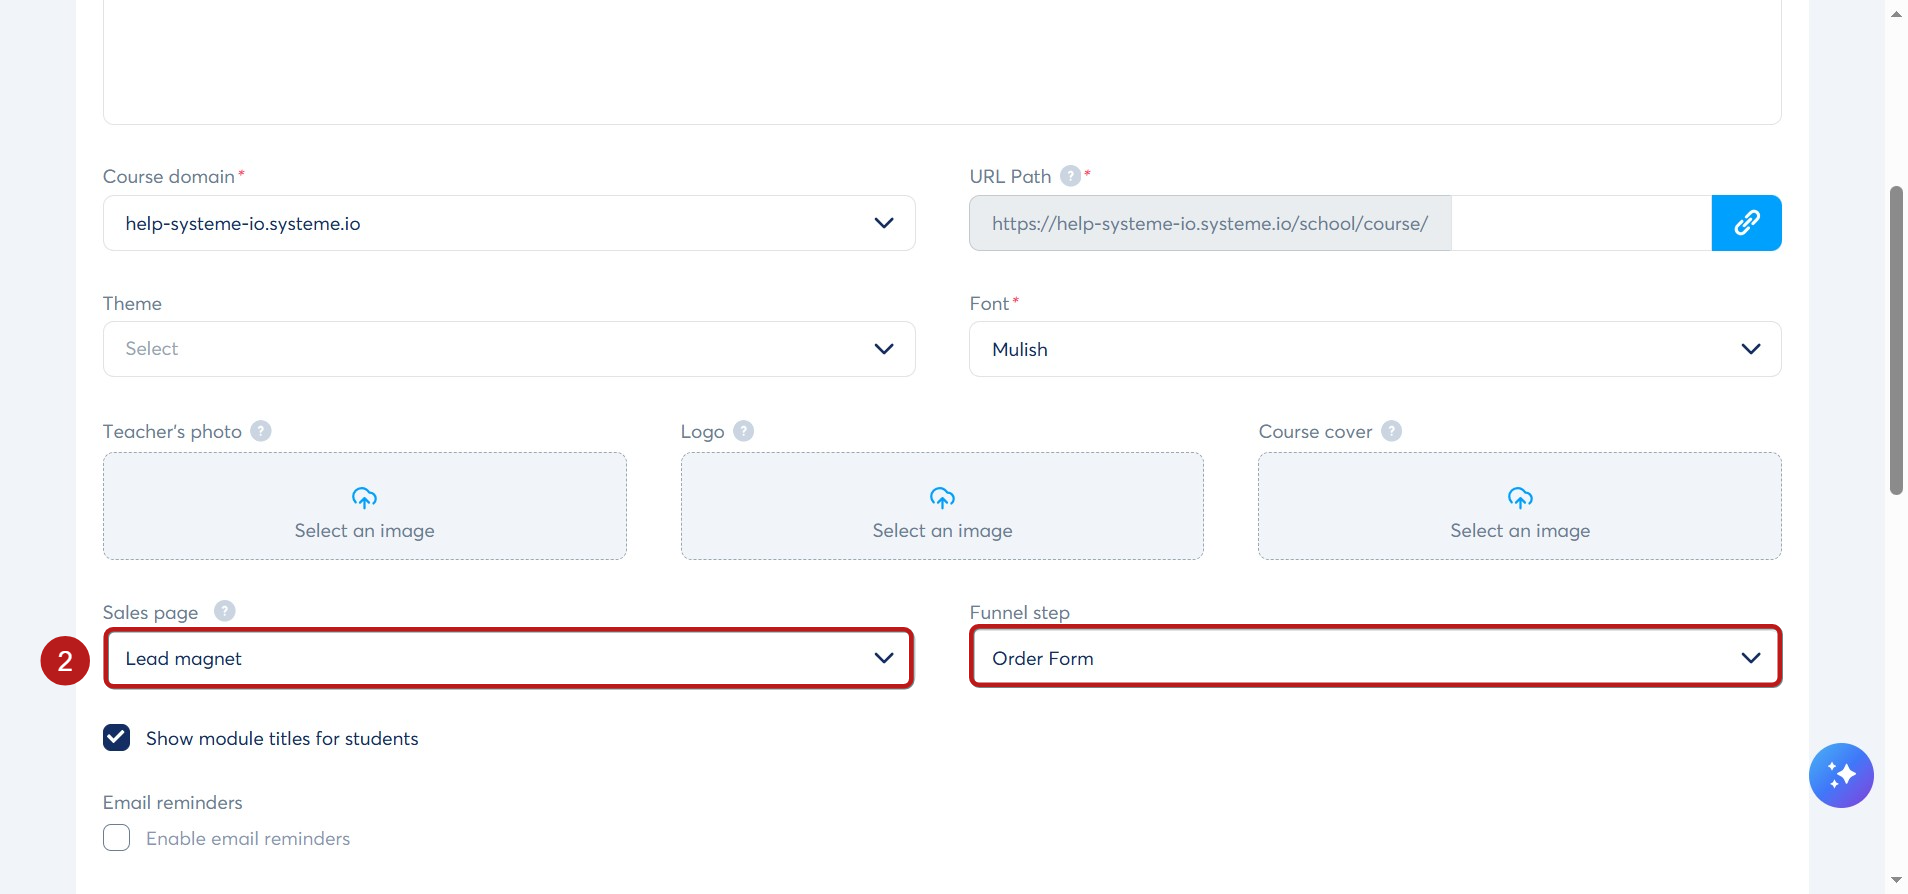
Scroll down to the Sales page section (3).
-
Select the Funnel and the specific Funnel step for your sales page.
-
Click Save at the top of the page.

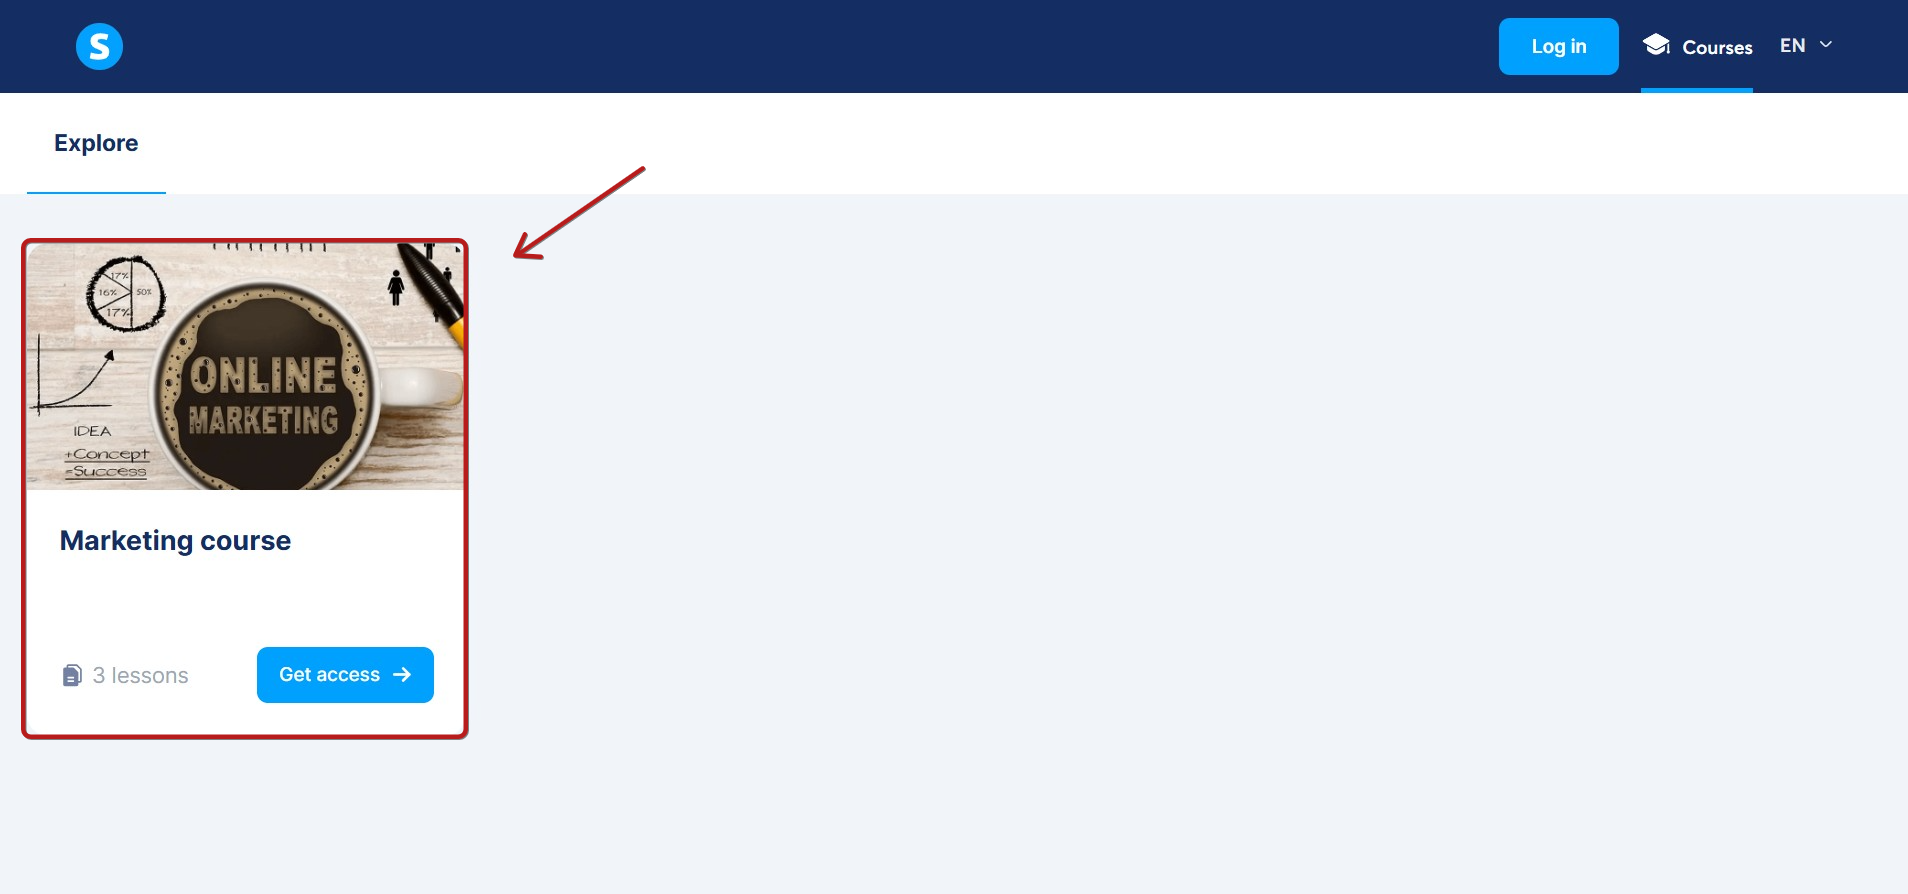
Once saved, your course will appear on your public school page at:
https://yourdomain.com/school
Notes:
-
Public access: Visitors can browse and discover courses at https://www.yourdomain.com/school, even without a systeme.io account.
-
Redirects: When a visitor clicks Get access, they will be redirected to the sales page you configured.
-
Important: You must link a sales page in the course settings. If you don't, the course will be hidden from the public school page.
Part 2: How to promote your courses on the student dashboard
Displaying other courses on the student dashboard is a great way to drive sales to students who are already enrolled in one of your programs.
-
Access course settings
Go to the courses tab and click Settings for the course you want to promote (1).
2. Link a sales page
Just like in part 1, you must link a sales funnel for the course to appear on the dashboard.
-
Scroll down to the Sales page section (2).
-
Select the Funnel and Step for your sales page.
-
Click Save.
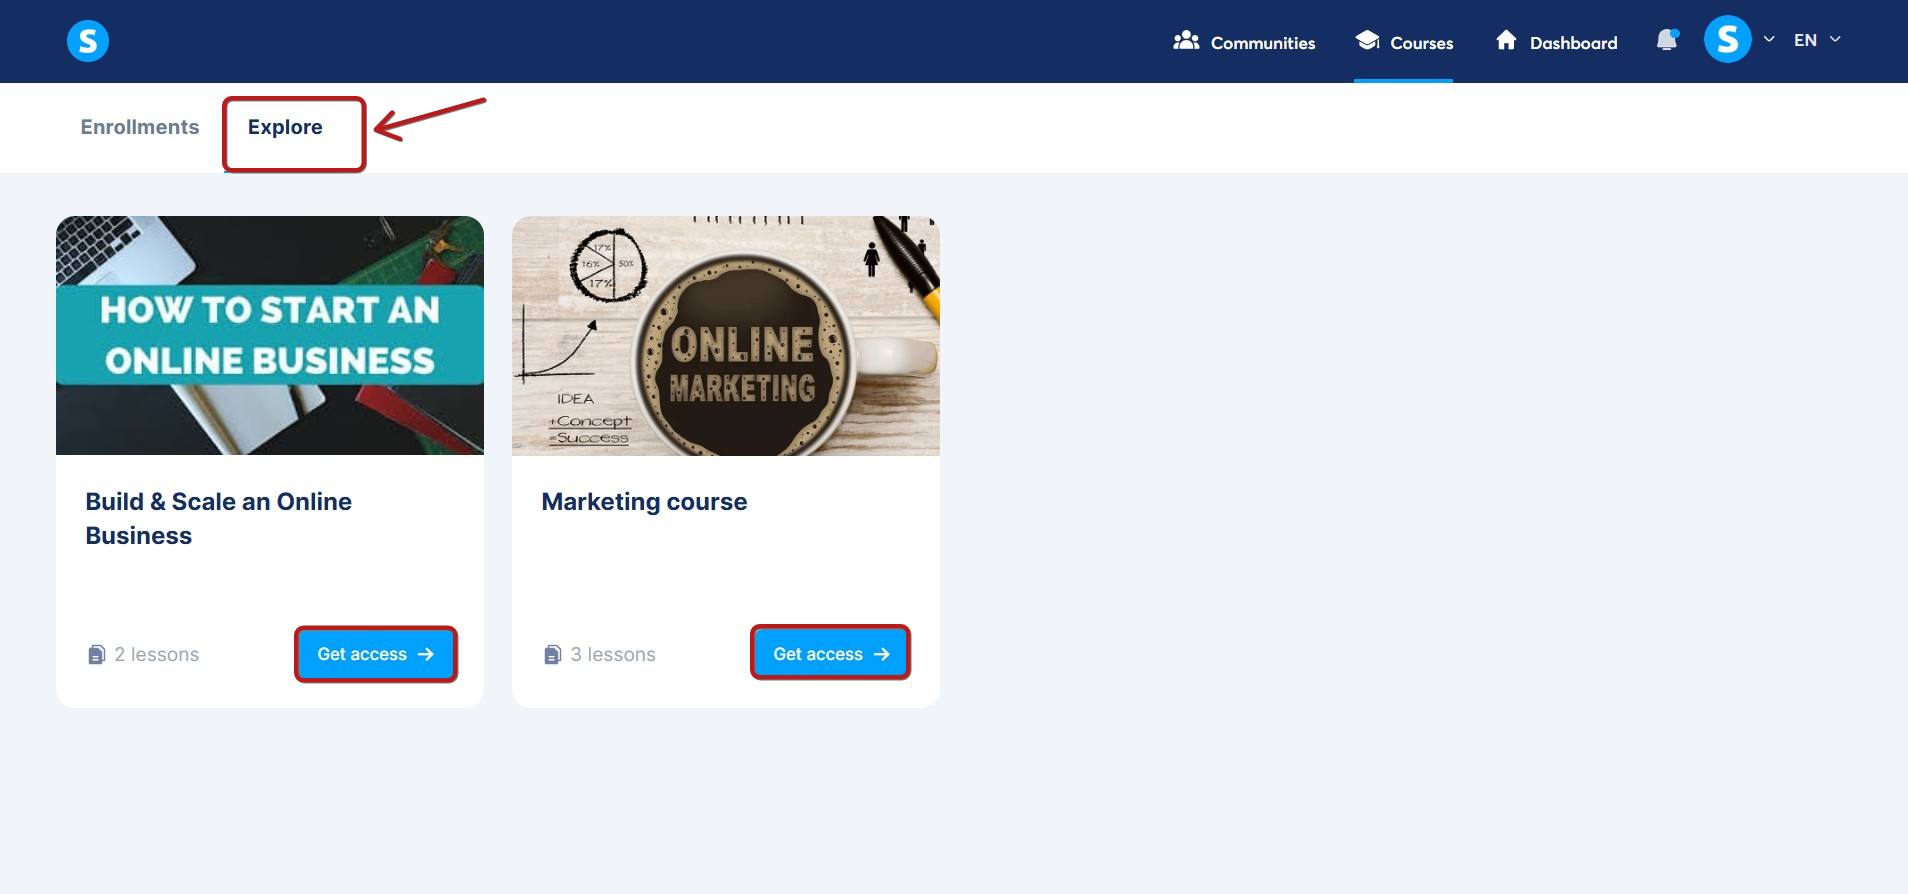
The student experience:
Once configured, your course will appear under the Explore tab in the student dashboard.
-
If they own the course: They will see an Open button to resume learning.
-
If they don't own the course: They will see a Get access button, which redirects them to your sales page.
Notes:
-
Visibility: The course will not appear on the dashboard or public page unless a sales page is linked in the settings.
-
Prerequisite: Students only see the Explore tab if they are already enrolled in at least one of your courses.
-
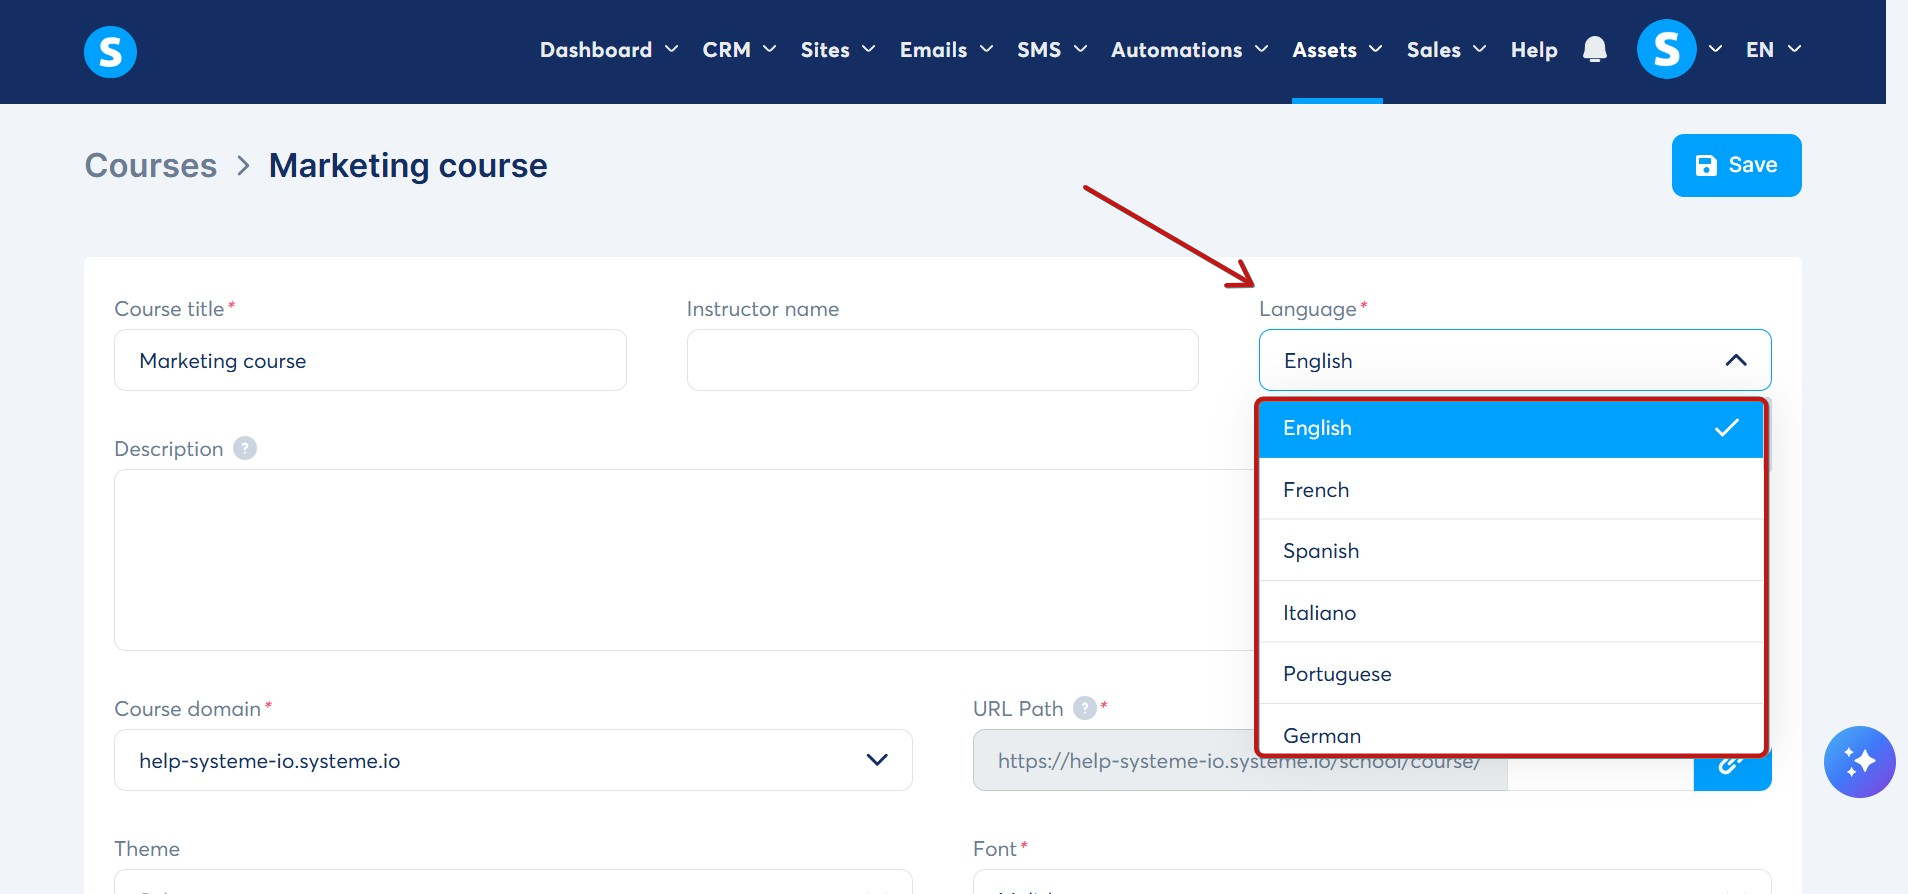
Language Matching: The Explore tab only displays courses that match the language of the student's profile.
Example: A student with their profile set to French will only see courses where the language is set to French. They will not see your English courses.
You can change a course's language in the course settings.